SimpleSAMLphp Service Provider Configuration

The following technical brief provides step by step instructions how to add a new Service Provider to SimpleSAMLphp (version as of this writing is 2.0.0) and leverage Google Workspace as Identity Provider (login provider).
First, you should install and be able to run SimpleSAMLphp. If you don’t have it yet running, please follow this tutorial explaining how to run SimpleSAMLphp using Docker.
Create a new SAML app within Google Workspace
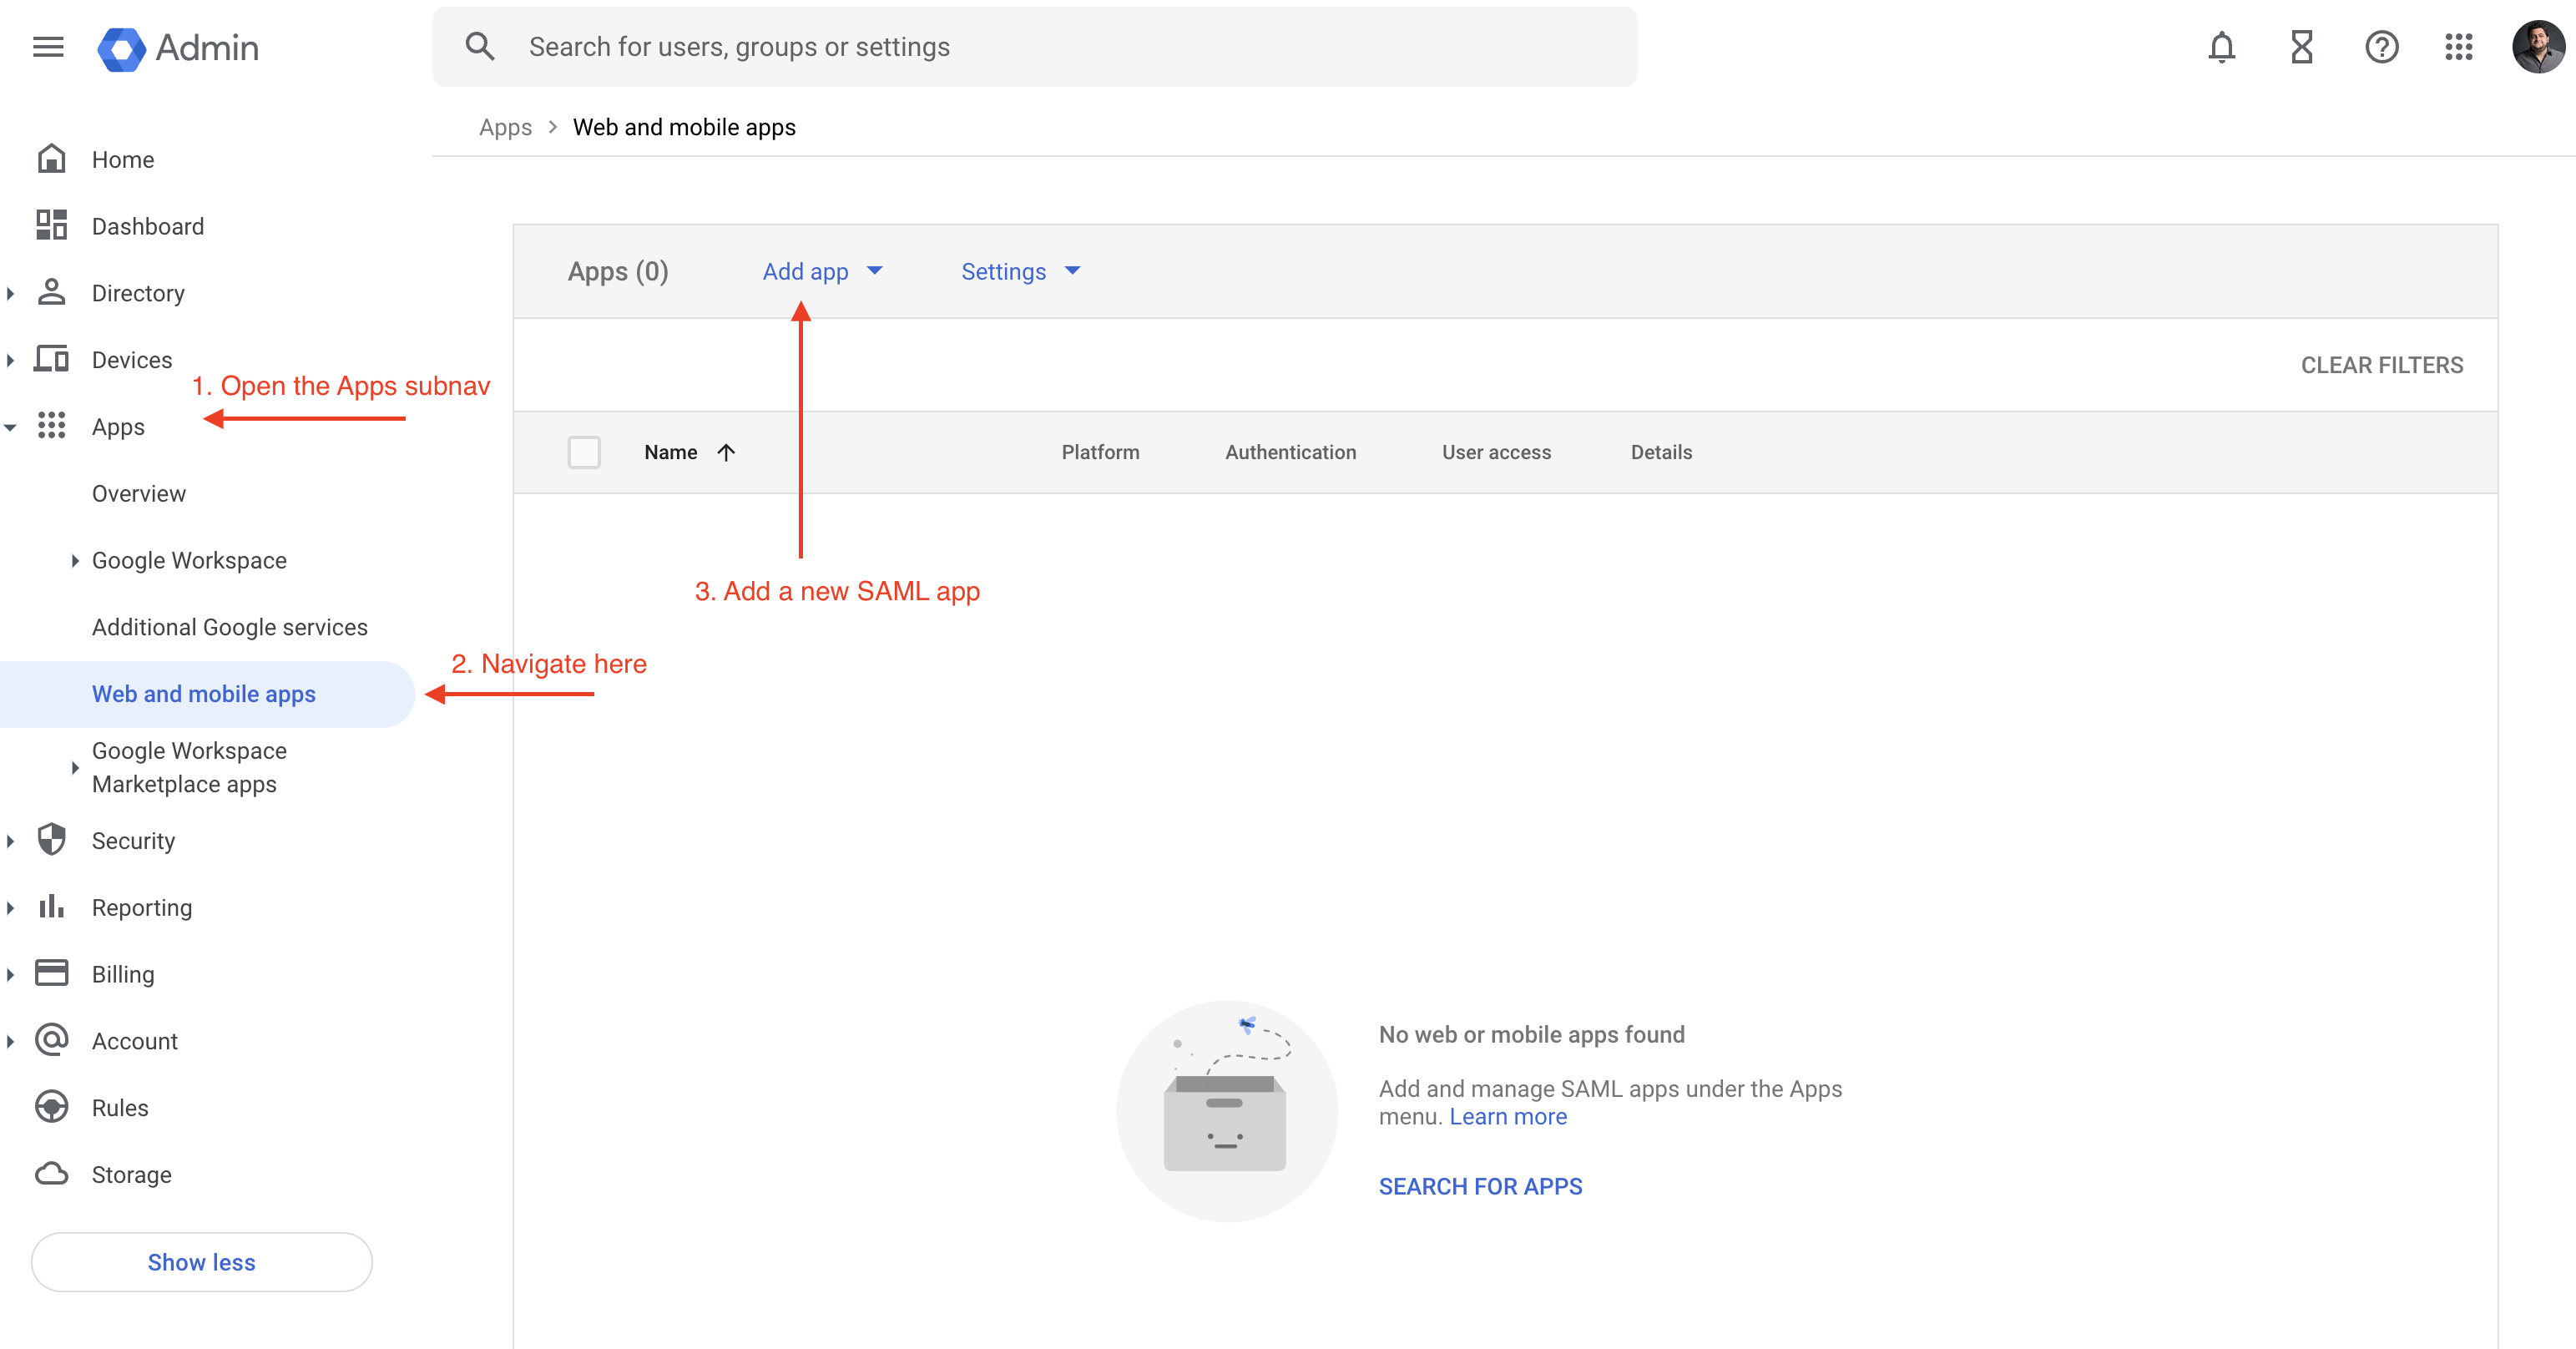
The first step here is to create a new app within Google Workspace. Once you login to Google Workspace as an admin, head over to Apps -> Web and Mobile Apps -> Add App -> Add custom SAML app as shown below:
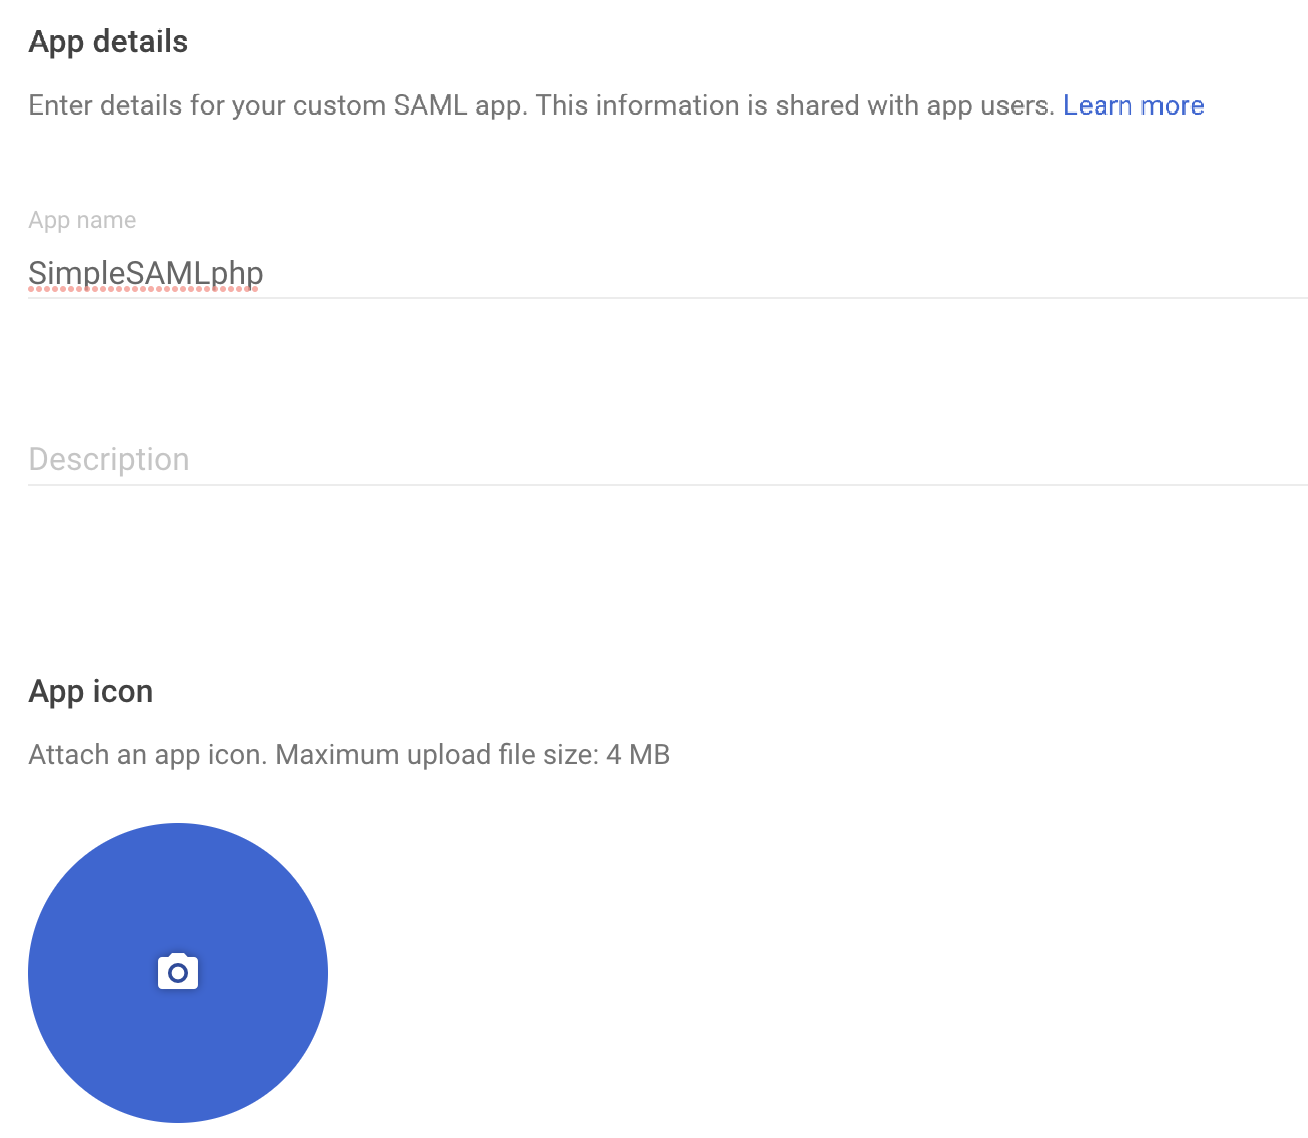
You will be asked to provide name, description and an icon, then will be taken to another screen where you will need to download the metadata.
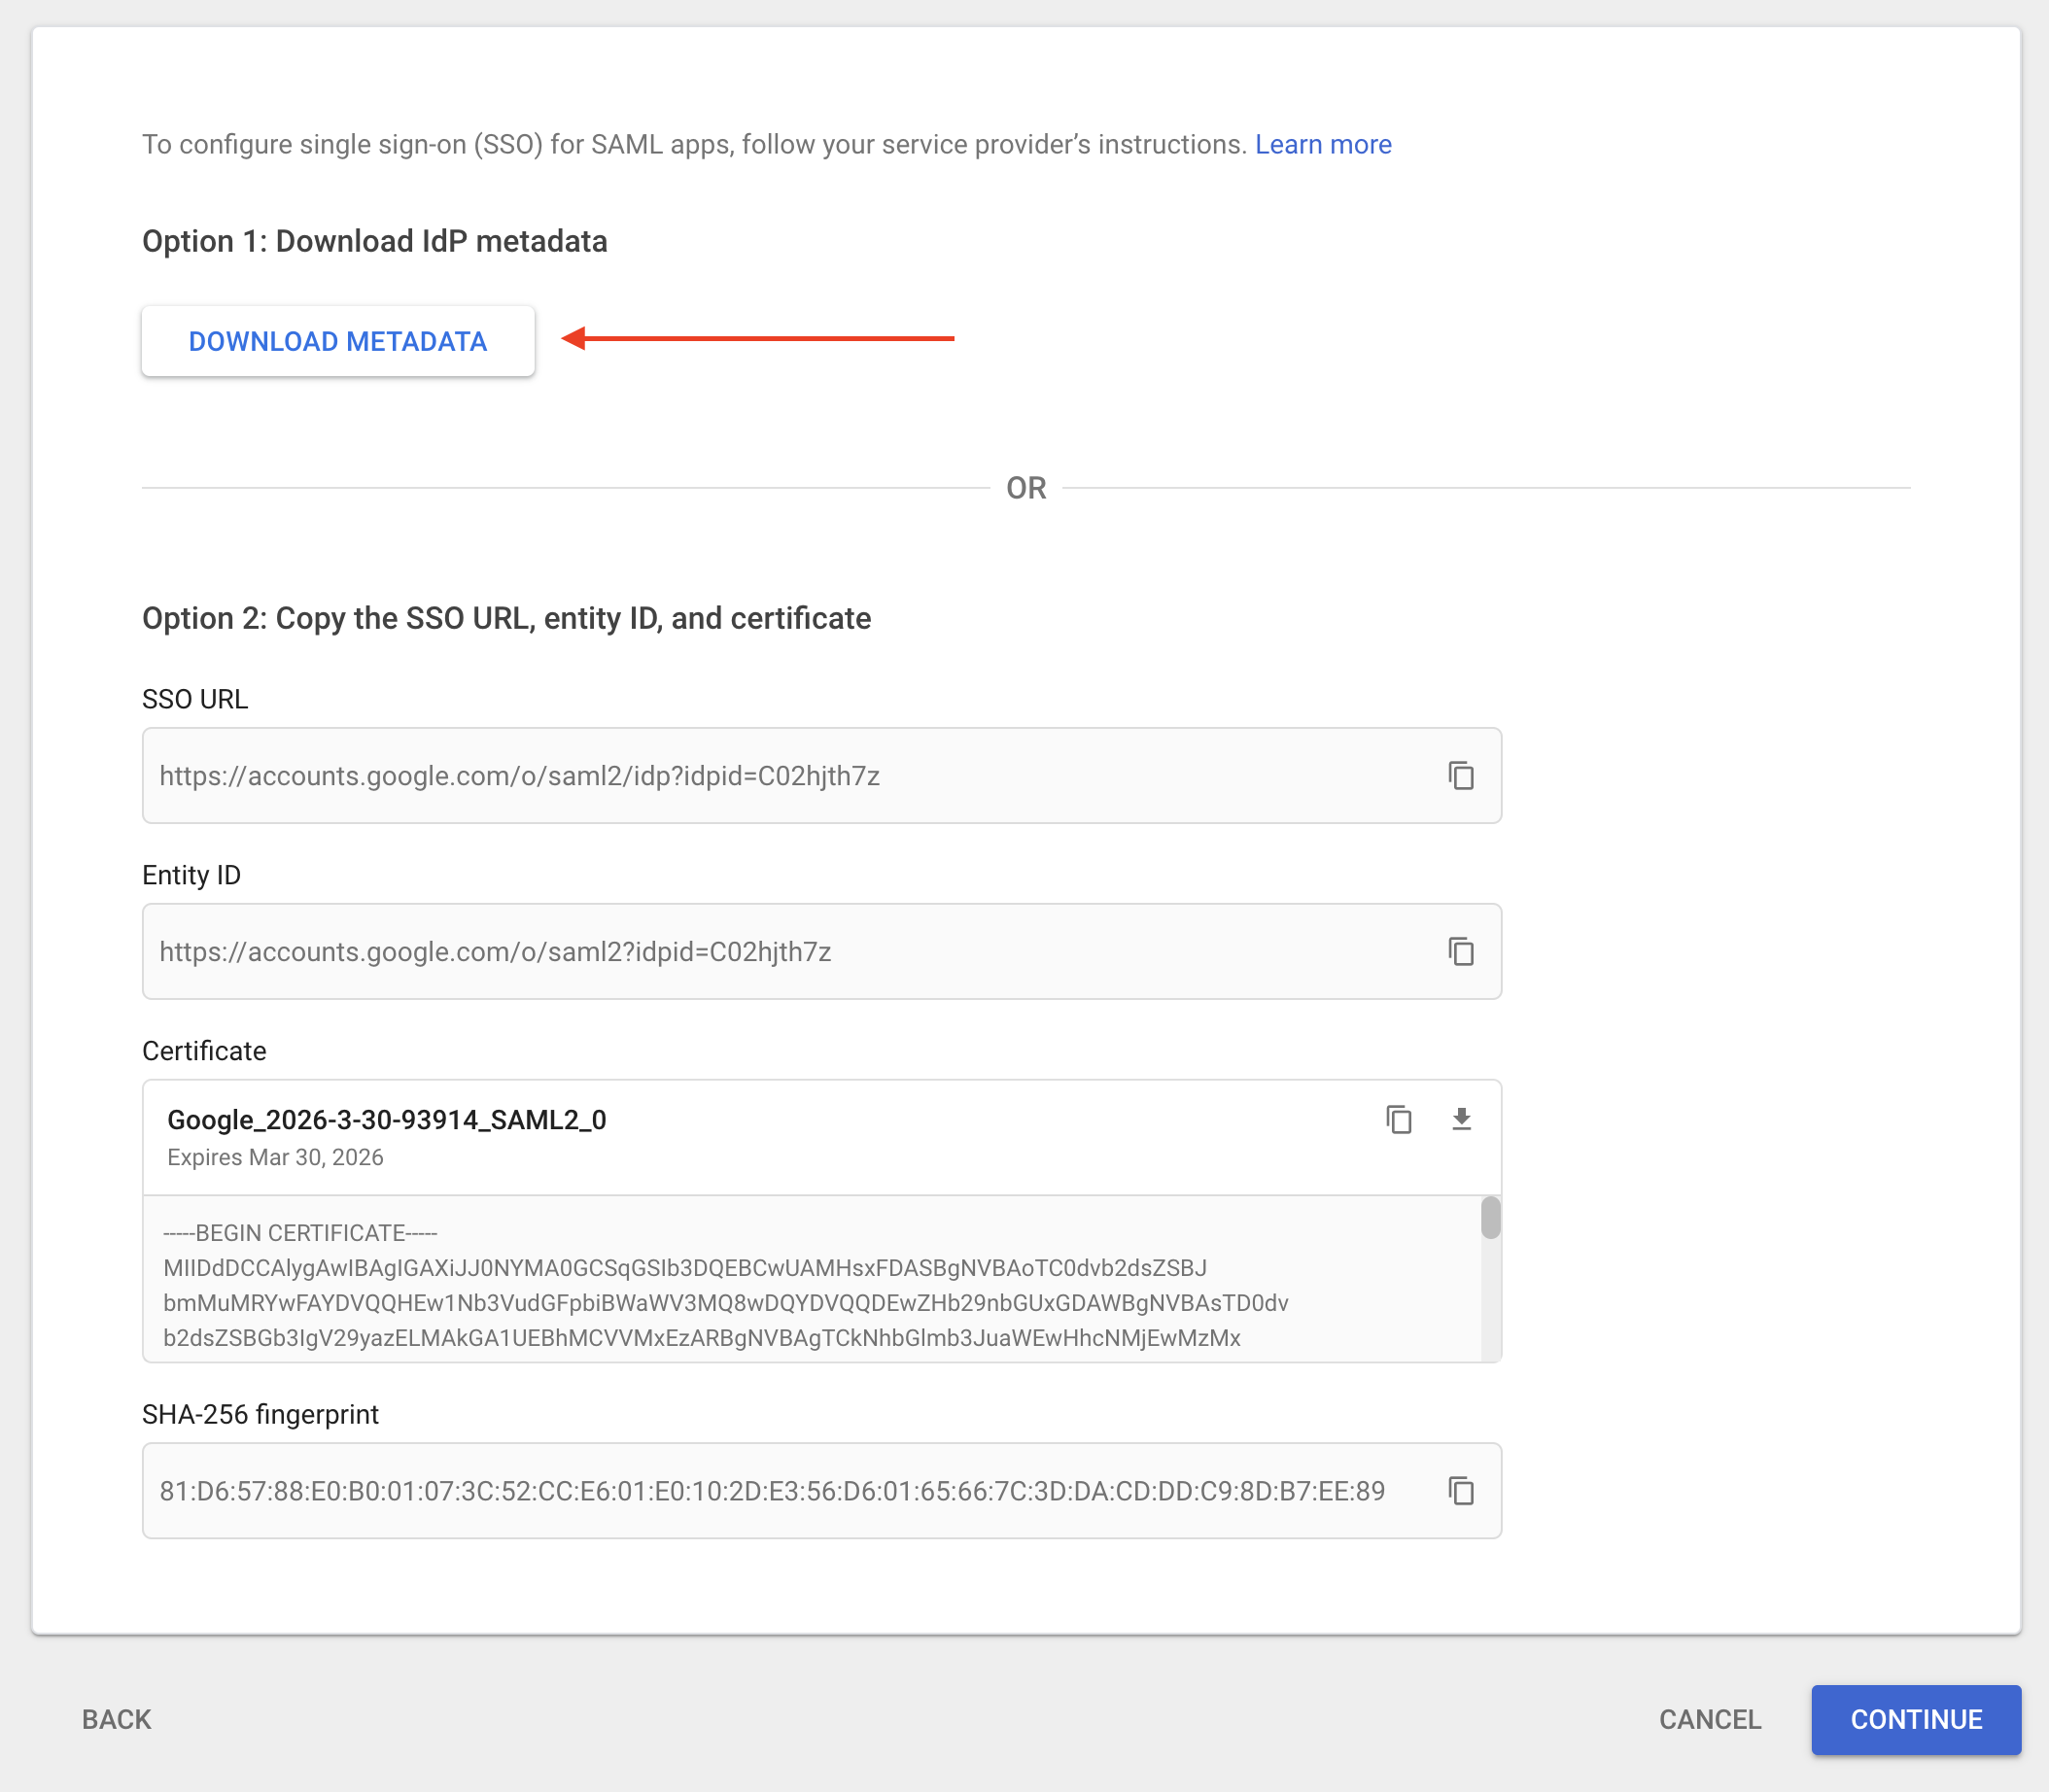
Then click on Continue, you will be taken to a final screen which will ask you for information about your service provider, in our case SimpleSAMLphp. The final screen looks like this:
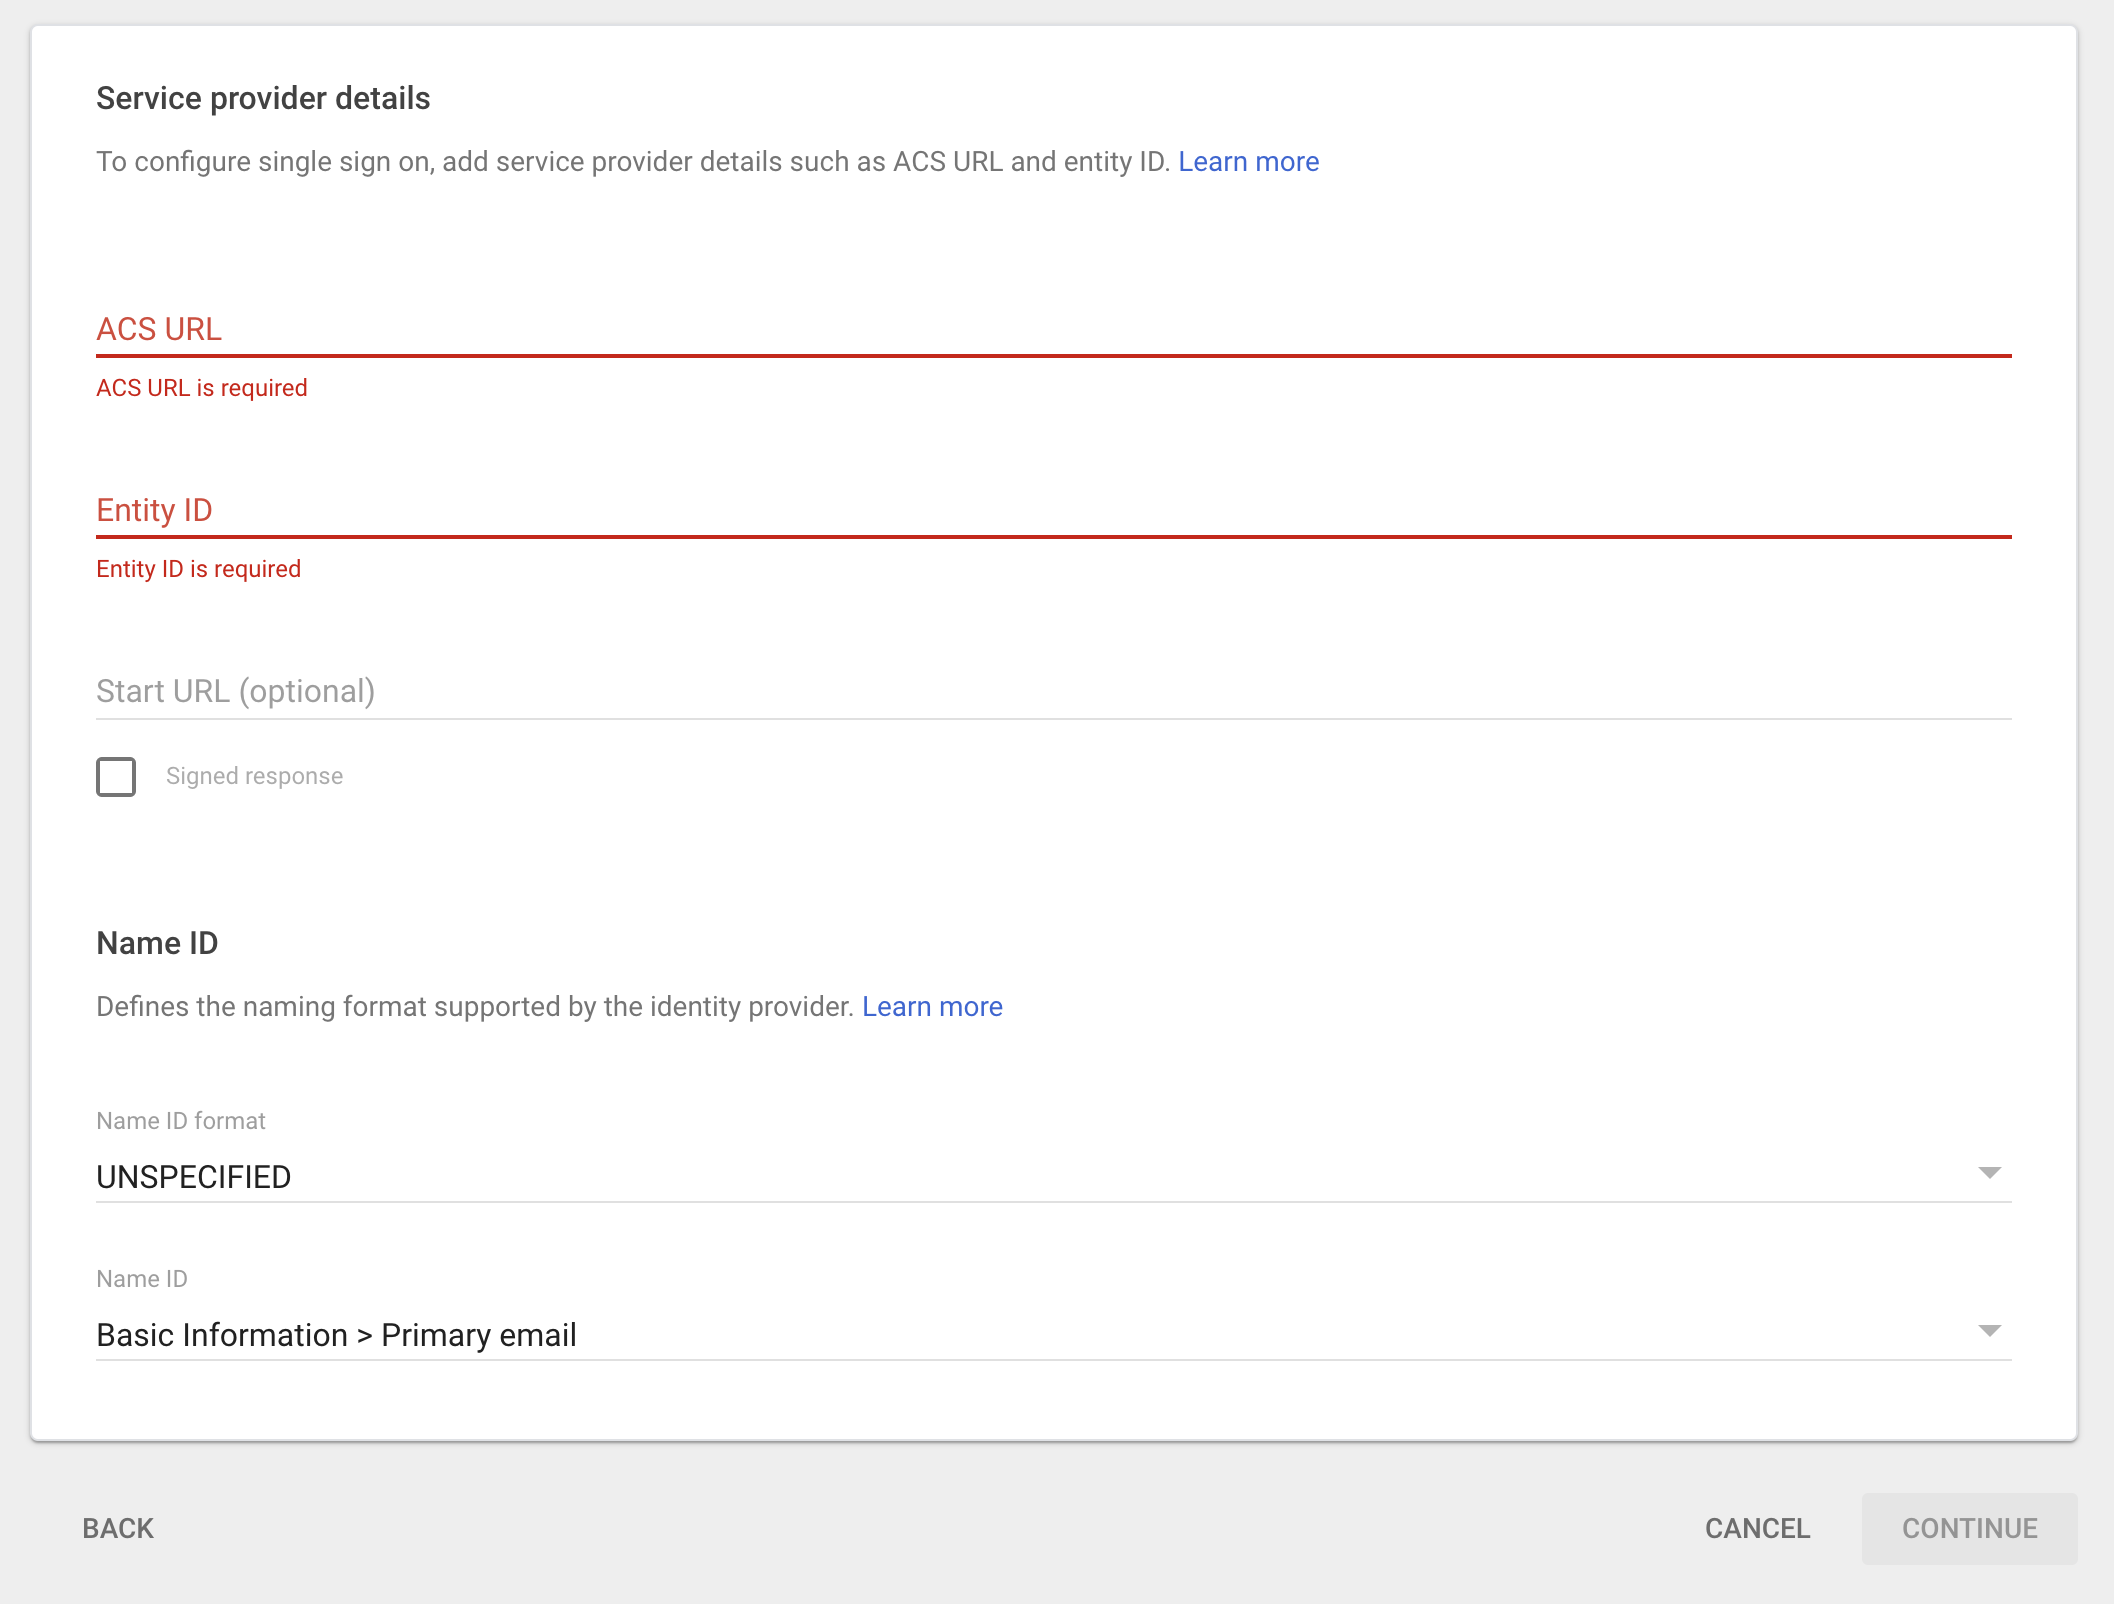
At this point, you need to process the metadata file downloaded within SimpleSAMLphp, steps are outlined in the next section.
Create a new Service Provider within SimpleSAMLphp
Now that we have initiated the creation of a new custom SAML app within Google Workspace, we need to tell SimpleSAMLphp about it. SimpleSAMLphp has provided a convenient way to parse a downloaded metadata and convert it to a PHP array which can be added to the list of identity providers located at metadata/saml20-idp-remote.php.
To do that, please follow the steps below:
- Login as an admin
- Go to
Federation - Click on
XML to SimpleSAMLphp metadata converter - Prase your metadata file
Result should look something like this:
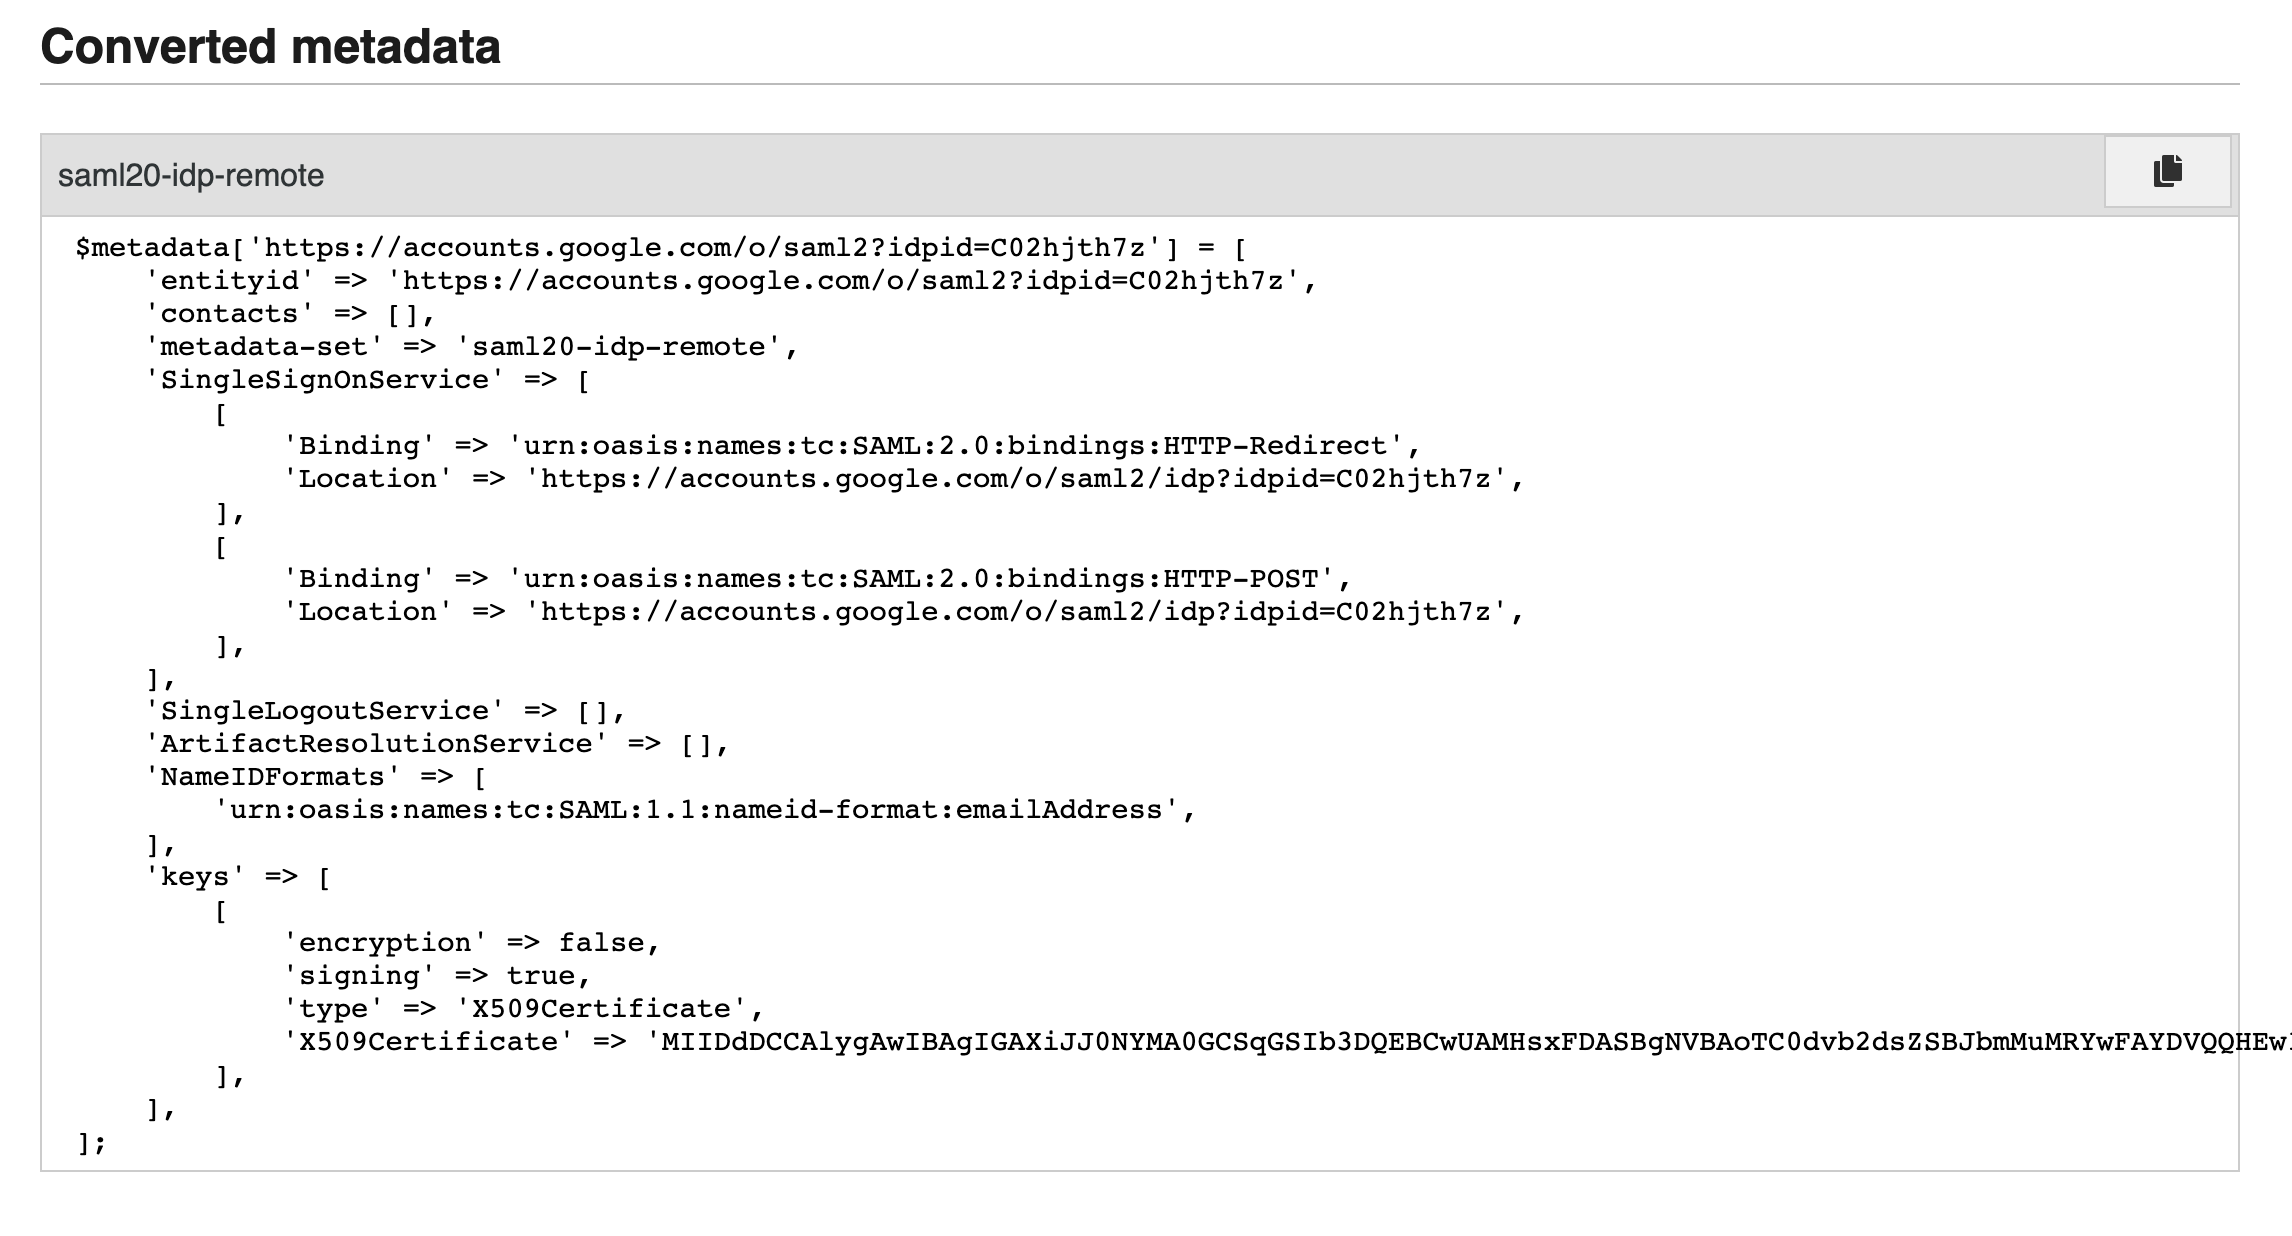
Copy this output and paste it into metadata/saml20-idp-remote.php.
Final step is to add an authentication source in your authsources.php file found at config/authsources.php. We will call this identity provider google-workspace.
You can use the code snippet below and just add your entityID and idp values.
'google-workspace' => [
'saml:SP',
'entityID' => '<entity id goes here>',
'idp' => '<idp goes here>',
'discoURL' => 'https://sp1.example.org/discovery',
'name' => [
'en' => 'A service',
'no' => 'En tjeneste',
],
'attributes' => [
'email' => 'urn:oasis:names:tc:SAML:1.1:nameid-format:emailAddress',
],
'attributes.required' => [
'urn:oasis:names:tc:SAML:1.1:nameid-format:emailAddress',
],
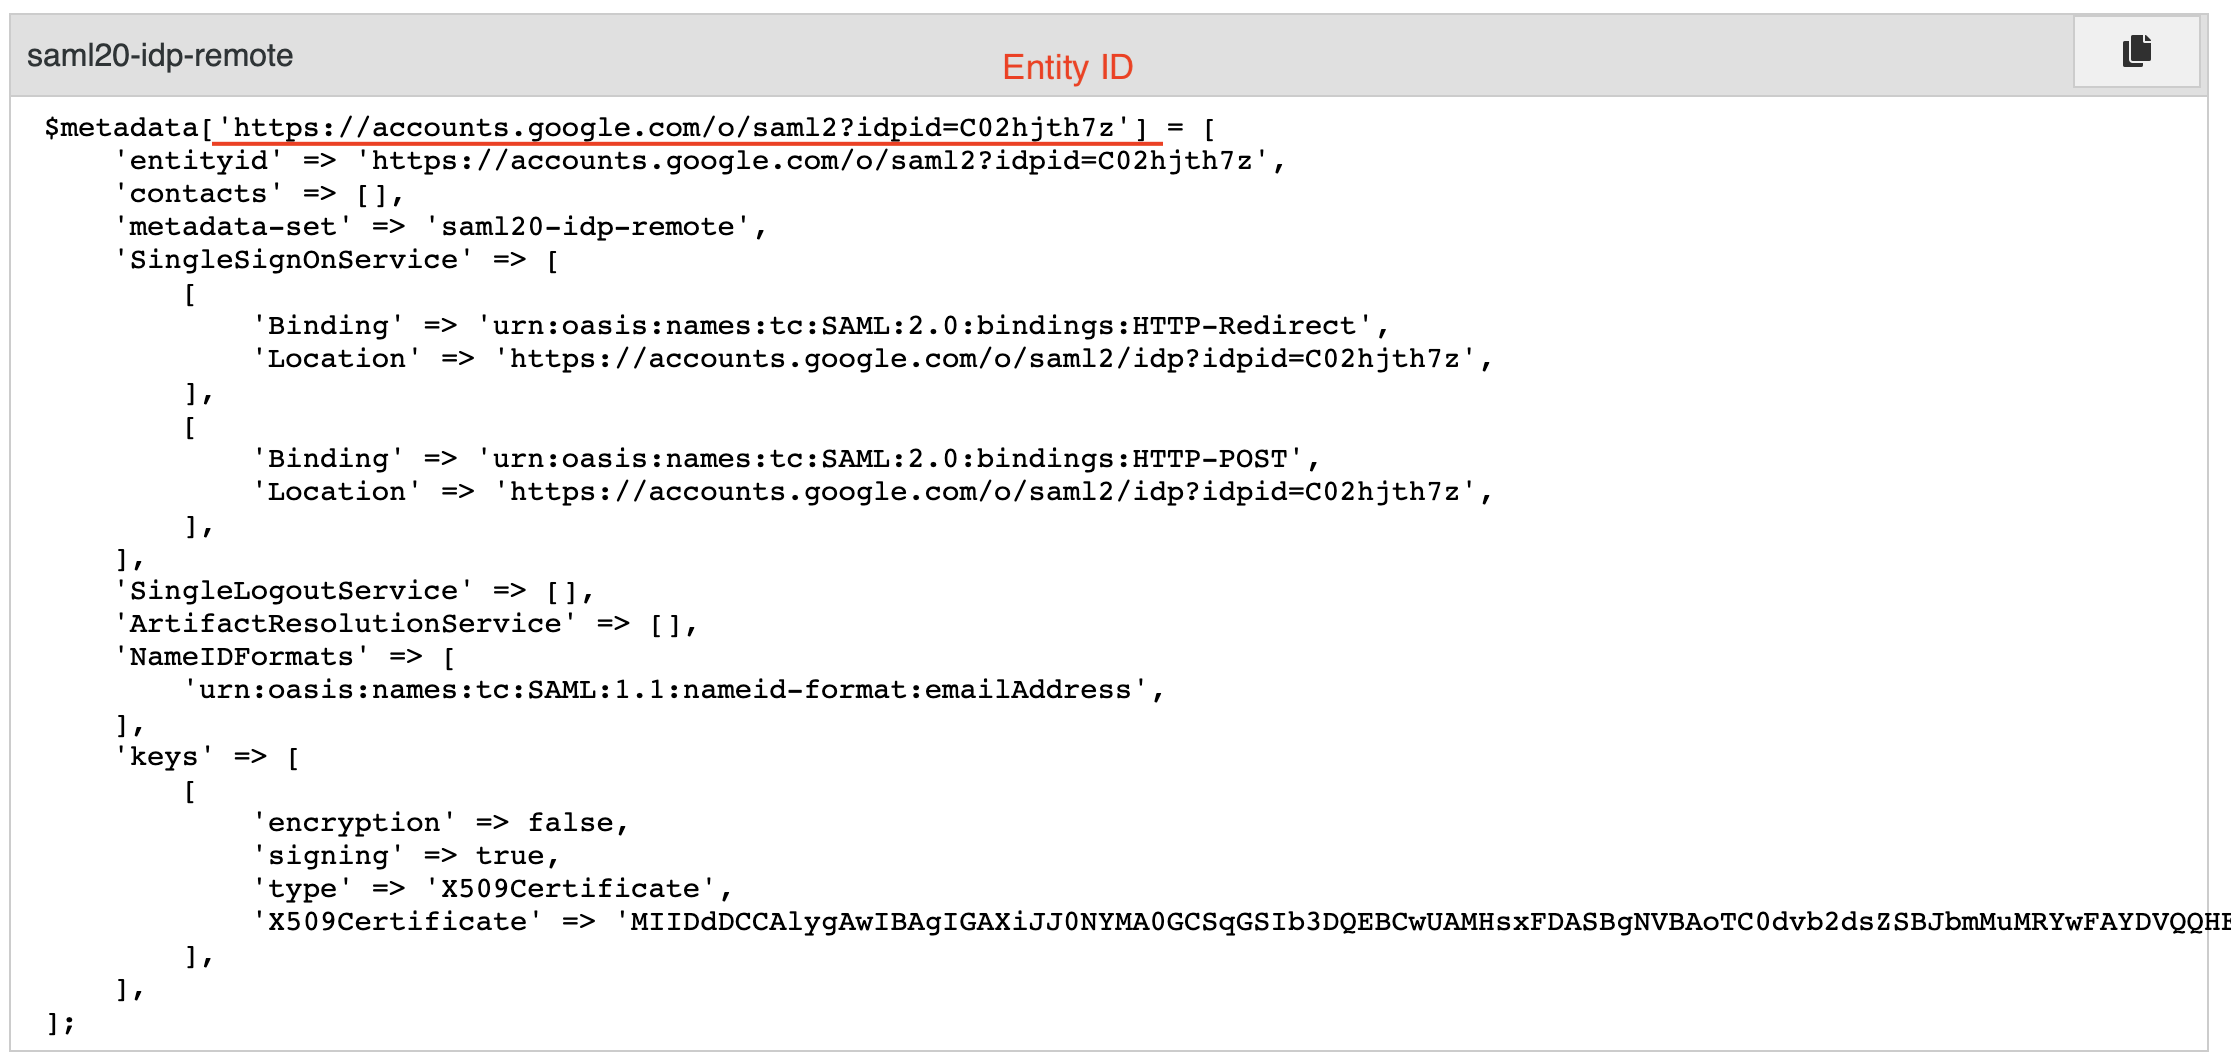
]Please note that your entityID should match the $metadata key element:
Finalize setup of custom SAML app within Google Workspace
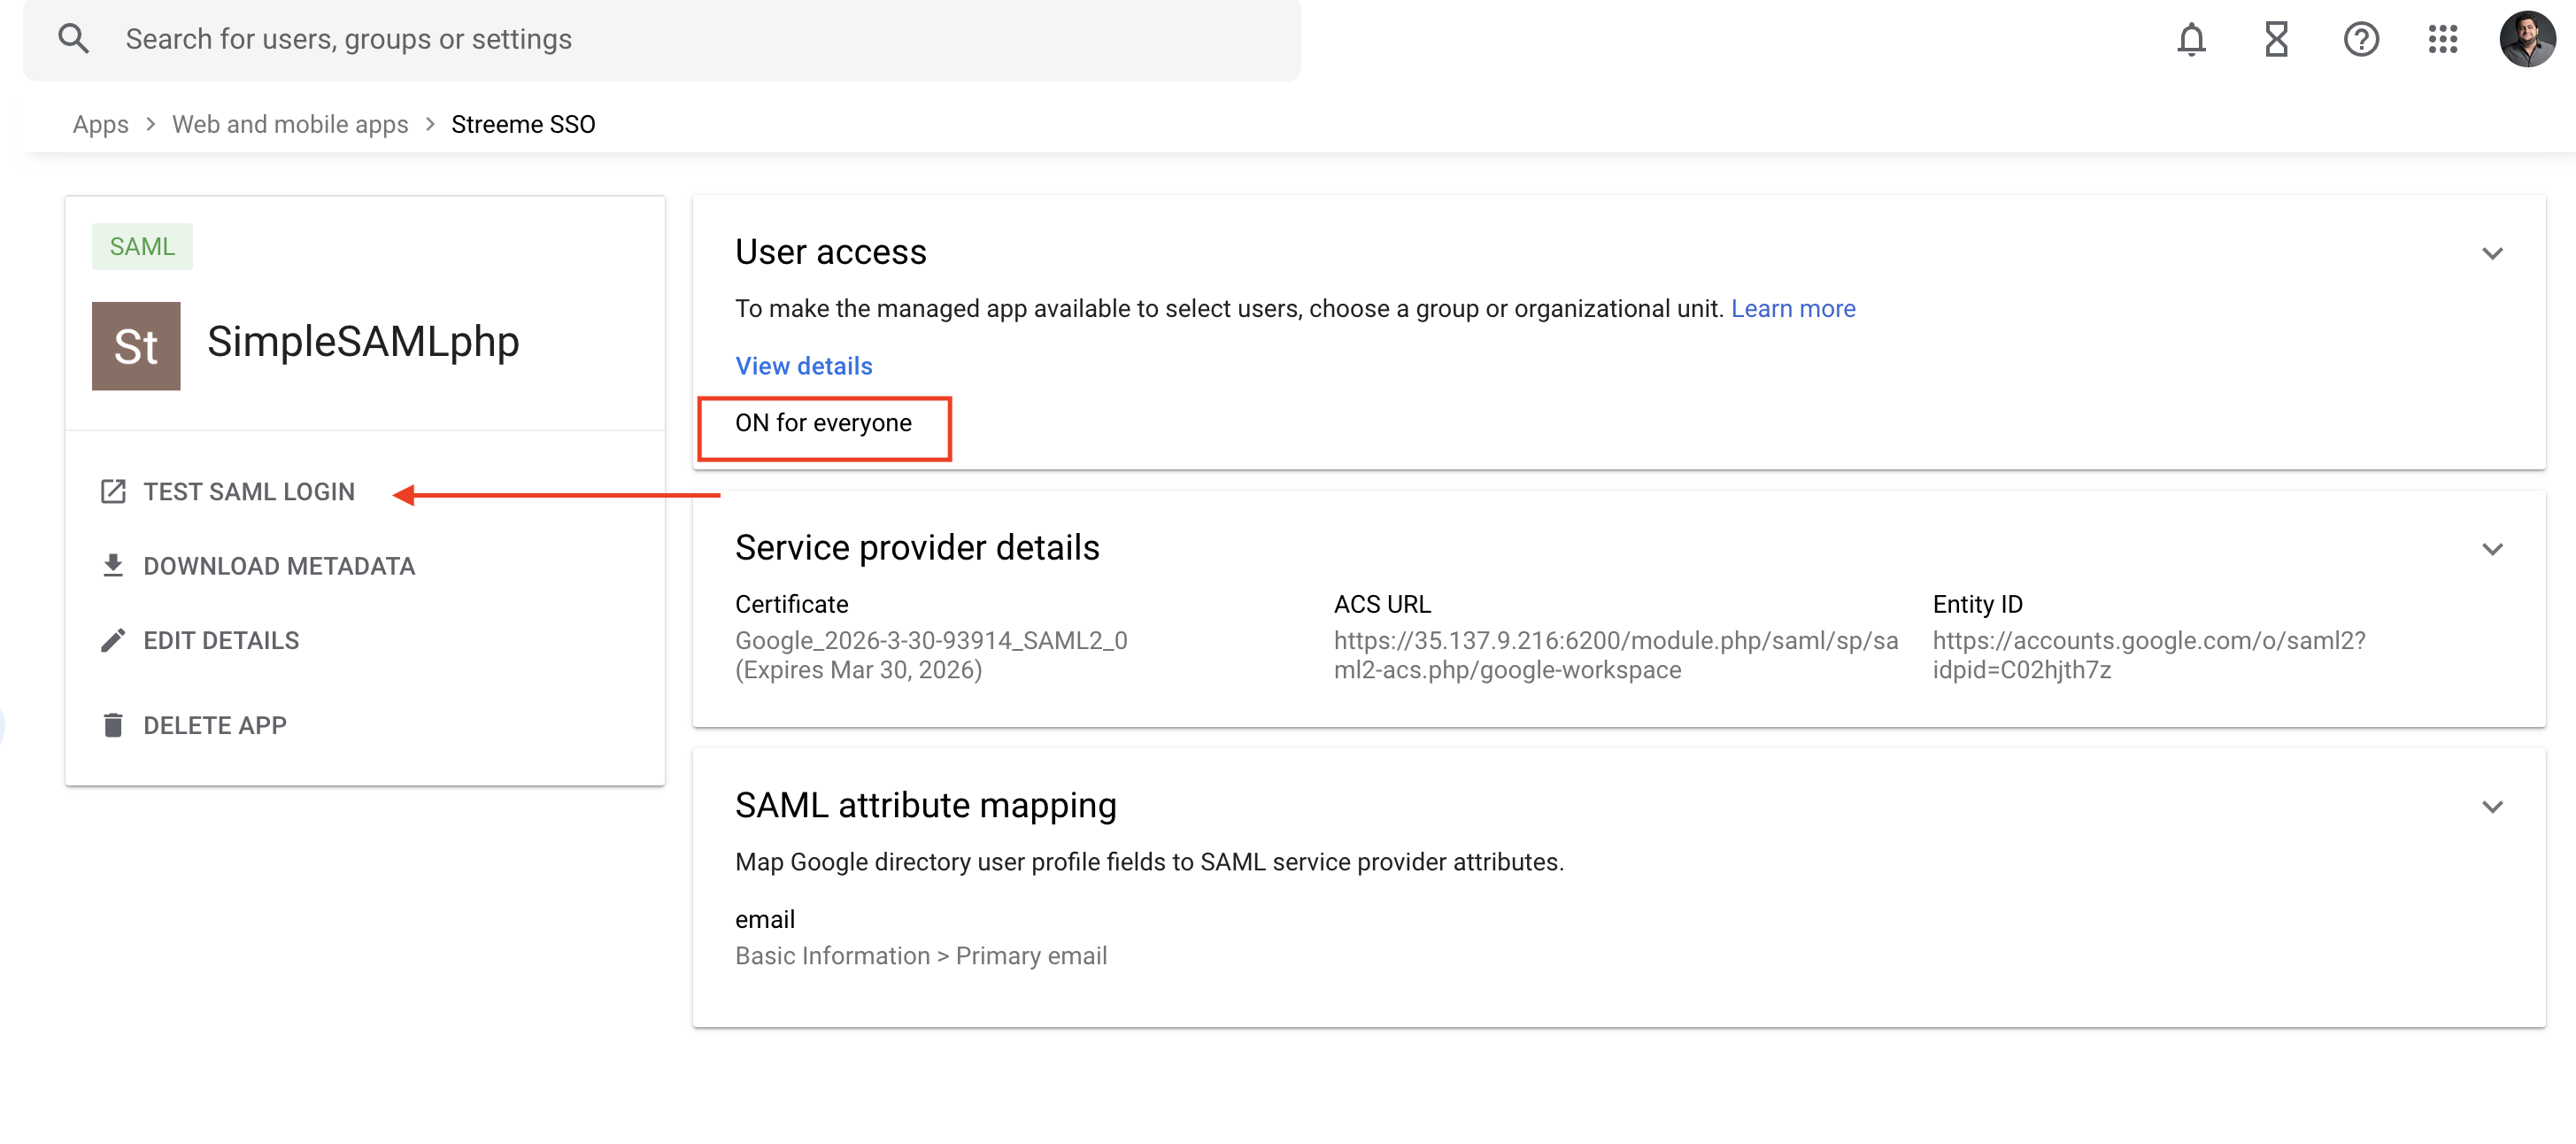
Finally, we need to go back to Google Workspace and pick up where we left off, which is at the final step of the custom SAML app process:
You can grab the entity id from your authsources.php file (the one we just configured) and the ACS URL from the metadata file that SimpleSAMLphp generated for you. You can find that at /module.php/saml/sp/metadata/<name of idp> in our case that would be:
/module.php/saml/sp/metadata/google-workspaceName ID format should be set to Email and Name ID should be Primary email. You can tailor those settings to your needs but Primary email is a sensible default.
You can finalize this process by clicking on Continue.
Make sure you give your user access to this app.

Testing SSO using SimpleSAMLphp and Google Workspace
We should test this from within Google Workspace and from within SimpleSAMLphp and we should be able to successfully authenticate and see our SAML response.
Testing from within Google Workspace
Open your custom SAML app using Google Workspace console and click on TEST SAML LOGIN. Make sure that your users have access to this app and then
After going through Google’s login flow you should be taken to SimpleSAMLphp login screen.
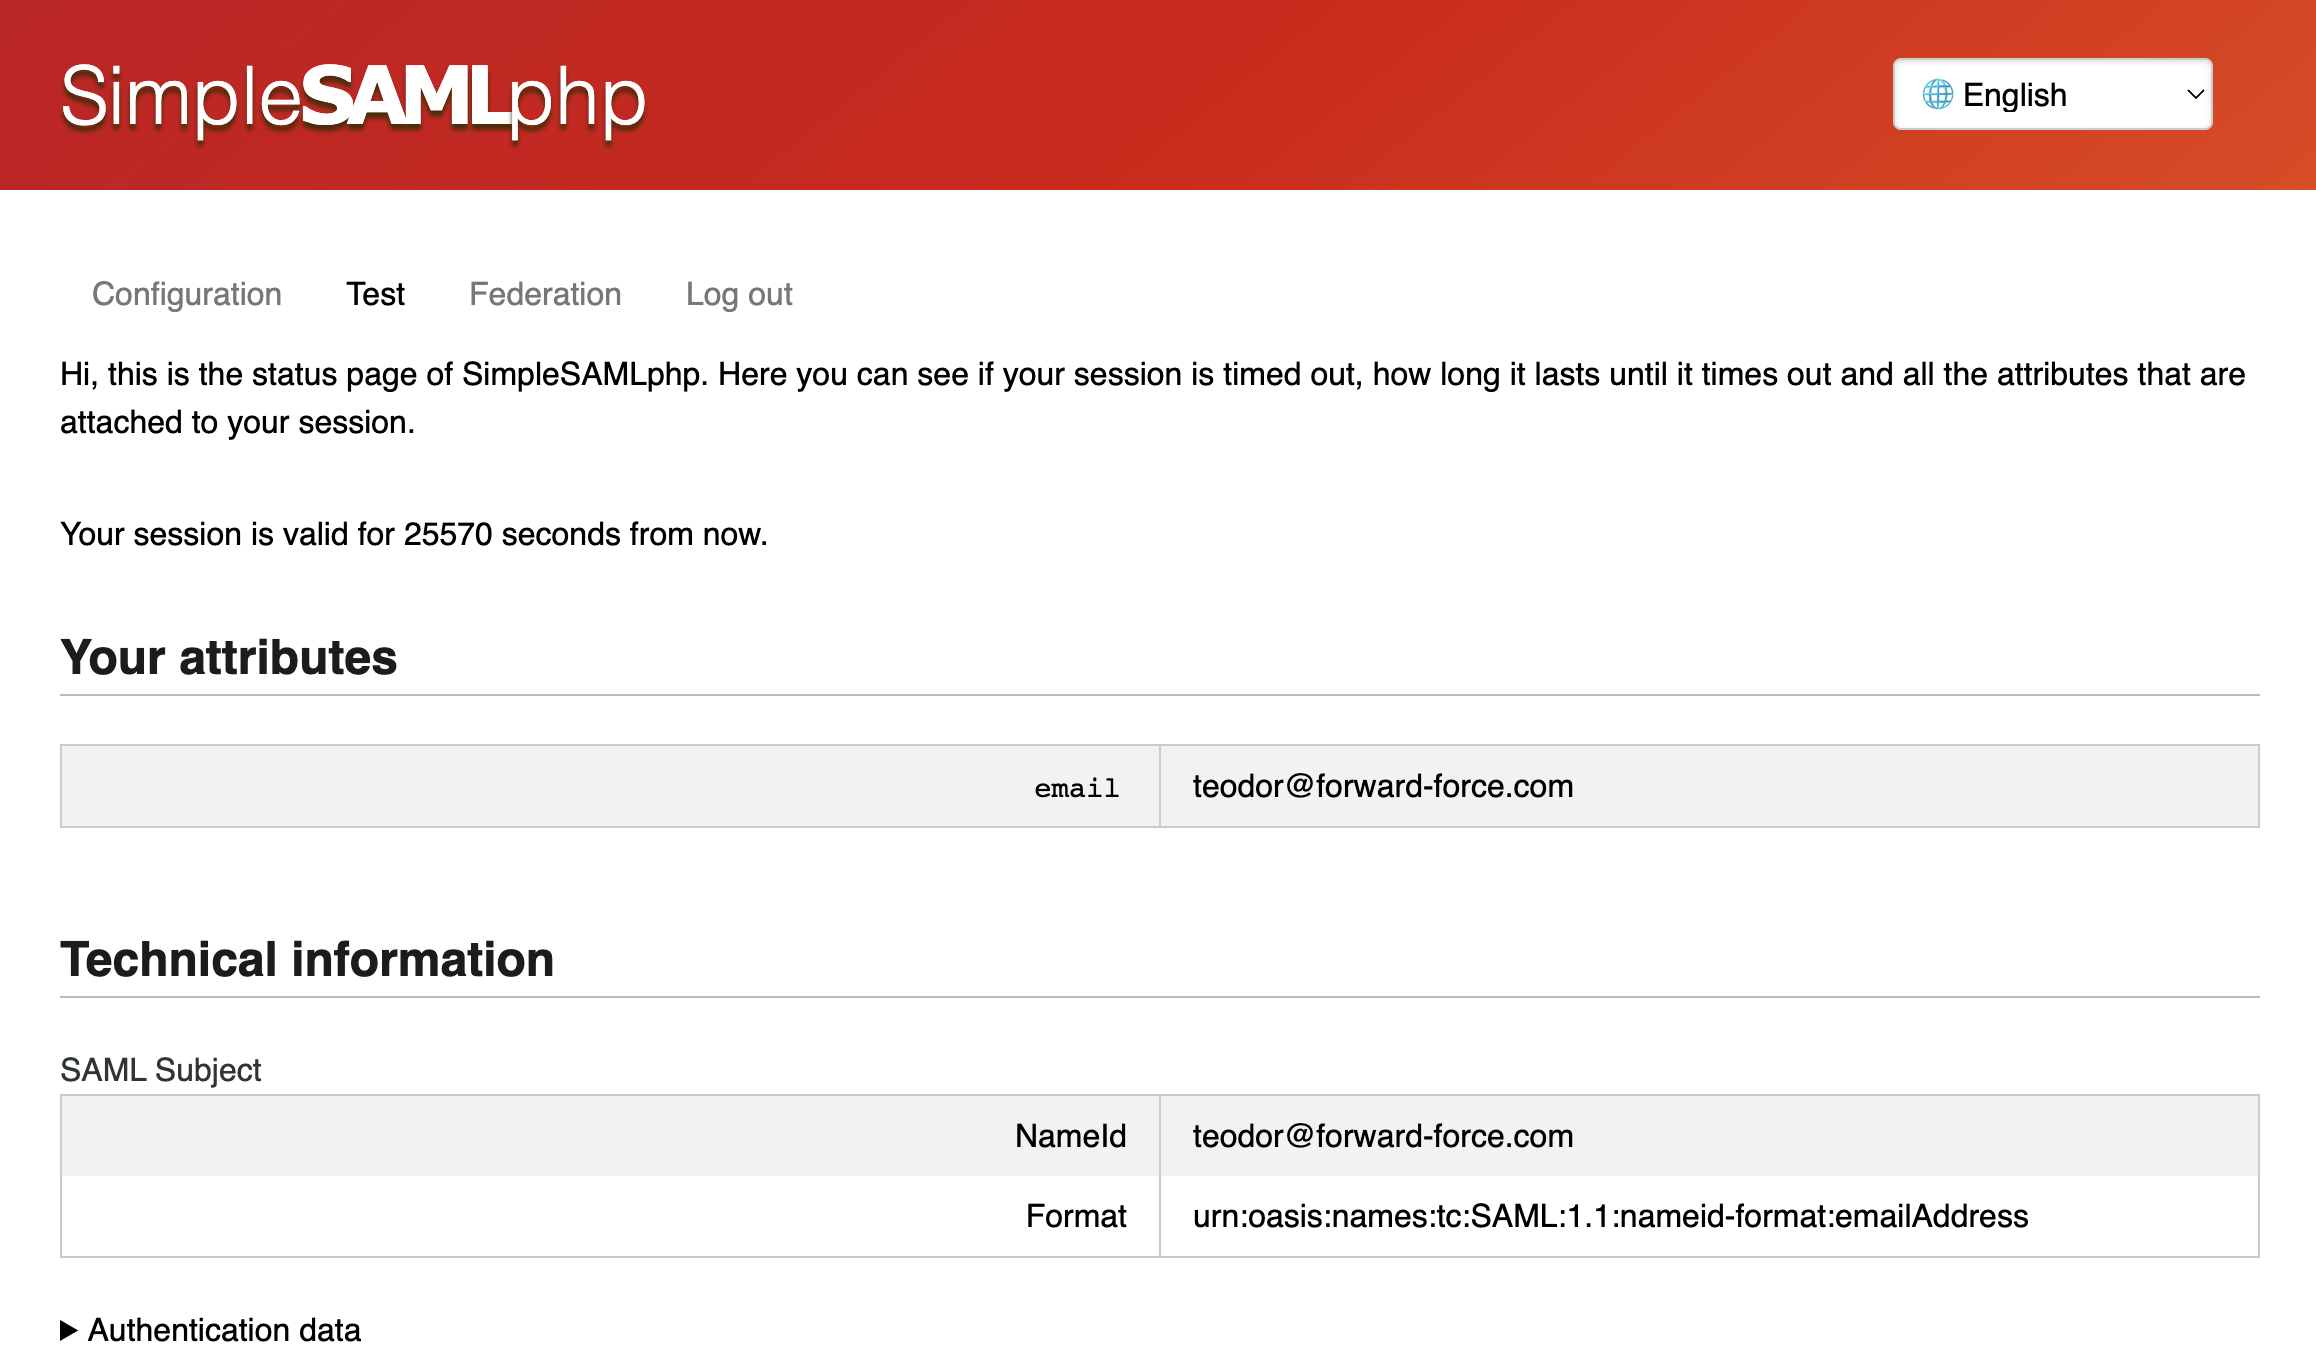
Testing from within SimpleSAMLphp
To test from within the SimpleSAMLphp admin console, login as an admin by going to /admin and then head over to Test. Pick your identity provider from the list, in our case google-workspace. You will be taken through the Google login flow and finally you should see a screen with your email on it (since we requested to get an email attribute from Google.
Ta-da, you are done!